Ring-Grooved Lock-Bolt,Ring-Grooved Lock Bolt,Ring-Grooved Bolt Latch,Ring-Grooved Barrel Bolt Latch TIANCHANG FASTENER SYSTEM CO..LTD , https://www.toprivet.com
How to quickly call CAD frames into SolidWorks drawings
At present, many companies use their own unique CAD frames in engineering drawings. Redrawing these frames in SolidWorks can be time-consuming and inefficient. The challenge is how to quickly import existing CAD frames into SolidWorks drawings. This is a common concern among engineers and designers.
Since these frames are already available in DWG format, you can open them using the built-in 2D design tool, DWG Editor, which comes with SolidWorks. The first step is to measure the width and height of the frame, as shown in Figure 1.

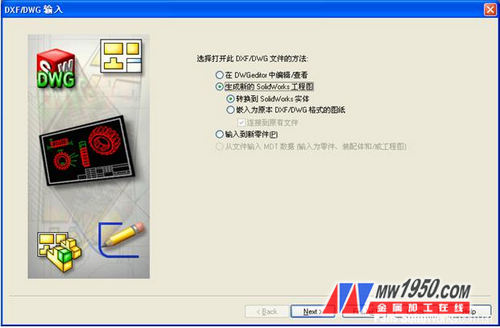
After obtaining the dimensions, open the CAD document directly in SolidWorks. A dialog box titled "DXF/DWG Input" will appear. Here, you can choose how to open the file. Since we want to create a SolidWorks drawing, select the appropriate option as shown in Figure 2.
Next, you'll see the "DXF/DWG Input - Engineering Layer Mapping" dialog box. Most CAD files have multiple layers, so it's important to select only those that belong to the frame, as illustrated in Figure 3.

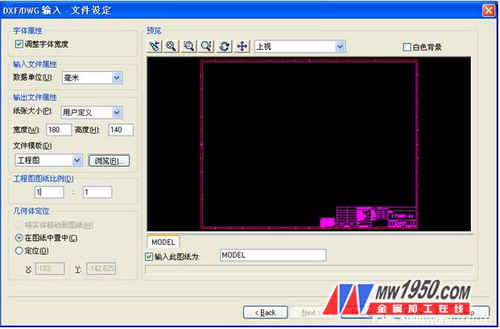
Then, proceed to the "DXF/DWG Input - File Settings" dialog box. This is where the key settings for importing the CAD frame take place:
1. Ensure that the "Font attribute" is checked to maintain consistent font width across the drawing.
2. Set the unit in "Input File Properties" to match the measured width and height of the frame.
3. Choose "User Defined" in the paper size option under "Output File Properties," and input the corresponding frame dimensions.
4. Set the Drawing Scale to 1:1.
5. Select "Centered" for Geometry Positioning.
Once completed, the settings should look like Figure 4.
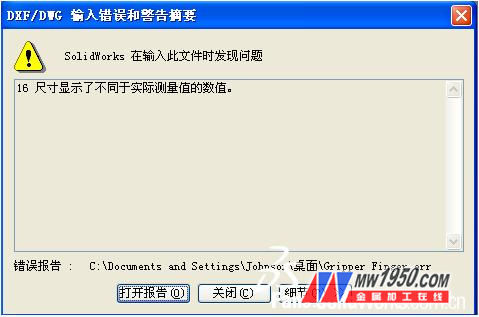
Click "Finish." If a prompt appears (as shown in Figure 5), simply click "Close" to skip it.
Now, the CAD frame should appear automatically in your SolidWorks drawing, as seen in Figure 6.

However, at this point, the frame is not yet part of the SolidWorks drawing template. To make it official, you need to cut the entire frame, enter the "Edit Drawing Format" mode, paste it back, adjust its position, and then exit the editing mode. Finally, save the drawing as a "Drawing Template" to use it for future projects.

Once saved, the process is complete. Now, every new drawing you create will include the desired CAD frame, saving you time and effort in the long run.