Rotating joint installation and ferrule joint distinction
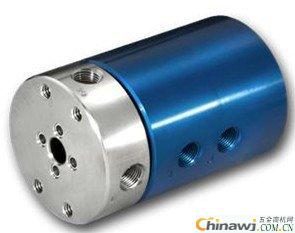
Rotary joints and ferrule joints consist of three main components: a joint body, a ferrule, and a nut. When the ferrule and nut sleeve are inserted into the joint body on the steel pipe, tightening the nut causes the outer edge of the ferrule's front end to make contact with the tapered surface of the joint body. At the same time, the inner blade of the ferrule evenly bites into the seamless steel pipe, creating a reliable seal.
The 24° cone W-column end is designed according to DIN 3861 standards, and the ferrule features a double-edged design for enhanced sealing performance. Typically, both the joint body and the nut surface are galvanized to prevent corrosion. These joints can operate at pressures up to 63 MPa, and they are compatible with seamless steel pipes with an outer diameter of up to 42 mm.
**Assembly and Installation Instructions for Rotating Joints and Ferrule Joints:**
1. Cut a suitable length of seamless steel tube and remove any burrs from the ends. The end face of the pipe should be perpendicular to the axis, with an angular tolerance of no more than 0.5°. If the pipe needs to be bent, ensure that the straight section from the end to the bend is at least three times the length of the nut.
2. Place the nut and ferrule onto the steel tube, making sure to follow the correct orientation. Do not reverse the order of the nut and ferrule.
3. Apply a lubricant to the threaded portion of the joint body and the ferrule. Insert the tube fully into the joint body, then tighten the nut by hand.
4. Continue tightening the nut until the ferrule makes contact with the tube. This point is usually felt as a sudden increase in resistance or torque.
5. After reaching this pressure point, give the nut an additional half turn to ensure a secure connection.
6. Remove the pre-assembled joint and inspect the ferrule’s engagement with the tube. The visible protruding edge of the ferrule should completely fill the space at the end of the ferrule. The ferrule should rotate slightly but not move axially.
7. For final installation, apply lubricant to the threads of the joint body and the compression nut. Tighten the nut until you feel the resistance increase, then give it an additional half turn.
These joints can be reassembled multiple times, provided all parts remain undamaged and clean.
**Alternative Installation Method:**
1. Insert the tube into the connector body until the ferrule makes full contact with the tapered surface of the joint body. Tighten the nut by hand.
2. Use a wrench to tighten the nut further until there is a sharp increase in torque, then add an additional quarter to half turn.
**Final Check:**
After assembly, inspect the tube to ensure that the ferrule has created a uniform slight projection at its end. The ferrule should not slide back and forth but may rotate slightly.
**Common Causes of Leaks:**
- The tube was not fully inserted.
- The nut was not tightened properly.
- The pipe was scratched or not perfectly round.
- The tube is too hard for proper sealing.
The ferrule-type pipe joint consists of three parts: a joint body, a ferrule, and a nut. When the ferrule and nut sleeve are inserted into the joint body on the steel pipe, tightening the nut causes the outer edge of the ferrule’s front end to align with the tapered surface of the joint body, while the inner blade bites evenly into the seamless steel pipe to form a secure seal. The 24° cone W-column end follows DIN 3861 standards, and the ferrule is double-edged.
Typically, the joint body and nut surface are galvanized for protection. These joints are capable of handling working pressures up to 63 MPa and can be used with seamless steel pipes up to 42 mm in outer diameter.
Cold Or Heat Flow Meter,Ultrasonic Cold Or Heat Flowmeter Machine,Dc Pipeline Integrated Heat Flowmeter,Electromagnetic Cold Flowmeter
Jiangsu Baichuang Instrument Group Co.,Ltd , https://www.subcip.com